This series will focus on demonstrating a simple client (iOS) and server (PHP/MySQL) implementation of the most basic type of passkey. This app has already been written, so we’ll look at it, and walk through its operation, in order to learn about implementing passkeys in an iOS app.
Our guide through this journey, will be a very basic, one-screen iOS app that will act as a UX to a simple CRUD server.
Here is the repo for the Passkey Demo Project.
It includes both a server portion (in the “Server” directory), and a client app workspace (PassKeysDemo.xcworkspace).
The Server
The server consists of a single PHP file (PKDServer.class.php), that implements all the server-side functionality. This file provides a simple PHP class that is instantiated in the index.php file.
However, a lot of the passkey “heavy lifting” is actually done by a well-established PHP dependency (lbuchs/WebAuthn). We incorporate this into the server, via a Composer include.
The server has a simple, 2-table database. The tables are:
- An authorization/authentication table. This has the WebAuthn credentials, used by passkeys, as well as the login token.
- A user data table. This contains the data for each user. This is a display name, and a short “credo” string. Both are simple strings.
Remember that this is a bare bones demo. It has just enough complexity to provide a minimal practical example.
I use an internal user ID to relate the tables. I could use the Credential ID (more on that, later), but I prefer keeping all the authorization stuff sequestered into the auth table.
The App
The app workspace has two targets: one for UIKit, and one for SwiftUI. They don’t actually have anything to do with passkeys. They’re just there to give you an app wrapper. The passkey stuff is handled in a framework-independent Swift file (PKD_Handler.swift), included in both targets. It acts as the app model.
IOS implements passkeys via the Authentication Services SDK. That handles creating and storing passkeys, as well as managing the UI for selecting and authenticating them.
The two app targets use the same Bundle ID (which means that only one can be installed at a time). This allows them both to access the same passkeys. If you want to build your own copies of the apps, you’ll need to change the bundle IDs anyway, but I wanted to let you know why they share one, in the original project. If you give each app a different bundle ID, they won’t be able to access the same passkeys (which may be what you want). If you do that, then you will be able to install both apps at the same time.
The two app variants are also designed to be virtually identical. They are just there to show how we might implement the tech into each UI stack.
For purposes of this series, whenever we talk about the “server,” we mean the PKDServer.class.php file, and whenever we talk about the “client,” we mean the PKD_Handler.swift file.
Using the App
The app consists of just one screen, with a few simple standard UI elements. All server interaction is “behind the scenes.” The screen is the local expression of the server.
Upon startup, the app has not logged in, and you are presented with the Register/Login display (Fig. 1).
At this point, you can register a new account, by typing something into the text box (Fig. 2). This will be the “tag” for the new passkey.
 |  |
| Figure 1: Initial Display | Figure 2: Registering A Passkey |
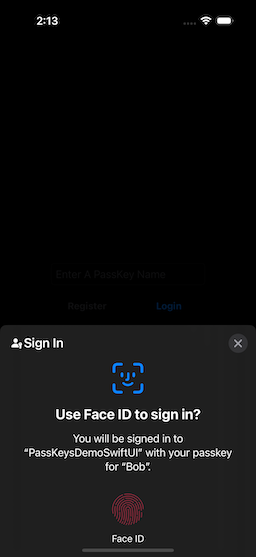
When we started to type something into the text box, the Login button became disabled, and the Register button enabled. Once you have entered the new passkey name, select the Register button, and you will be presented with the passkey confirmation screen (Fig. 3). If you select “Continue,” the biometrics authentication screen will display (Fig. 4).
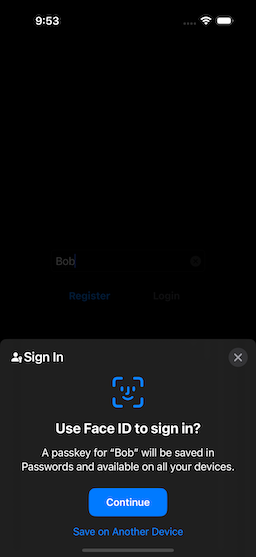 | 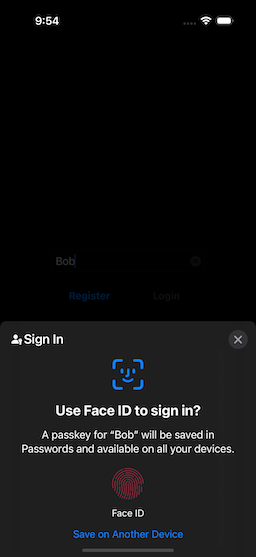 |  |
| Figure 3: Confirming New Passkey | Figure 4: Biometric Authentication | Figure 5: Initial Login Screen |
Read
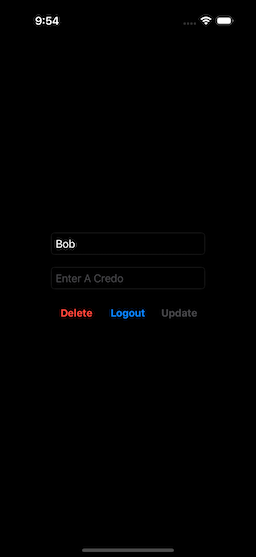
After creating the new account, the app logs in the user, reads the user data, and presents the initial logged-in screen (Fig. 5). Note that the Display Name is the same as the one selected for the passkey tag. This can be changed (but it cannot be blank).
An additional text box (Credo) is now shown (and is blank, at first), and the buttons change to Delete, Logout, and Update. Initially, the Update button is disabled.
Logging In
Once we have created one or more accounts, we can then use the passkey[s] to log in. In the initial screen, if you select the Login Button, you will be presented with the Passkey Login Selection Screen (Fig. 6).
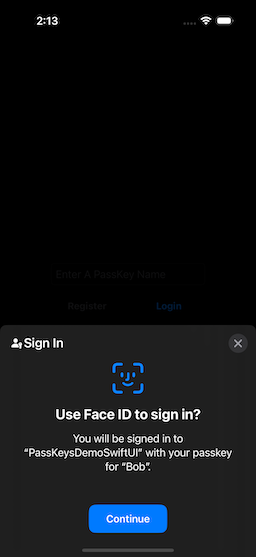 |  | 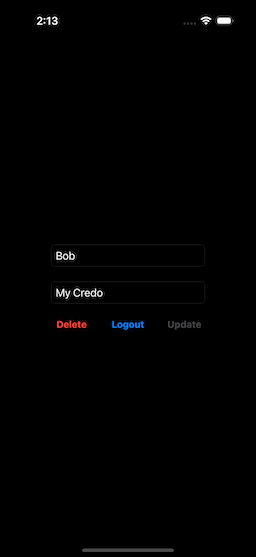 |
| Figure 6: Confirming Login | Figure 7: Biometric Authentication | Figure 8: After Login |
If you have registered multiple passkeys, then the selection screen will have a list (Fig. 9). Select a passkey, then proceed.
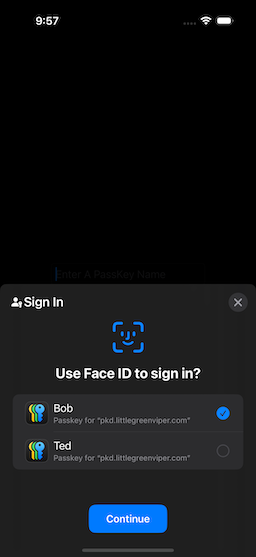 |
| Figure 9: Multiple Passkeys Registered |
Update
You can change the name, or enter text into the Credo text box (Fig. 10). As soon as we start to modify the text, the Update button becomes enabled (Fig, 11). Selecting this button will immediately send the changes to the server, and the Update button becomes disabled, once more (Fig. 12).
| 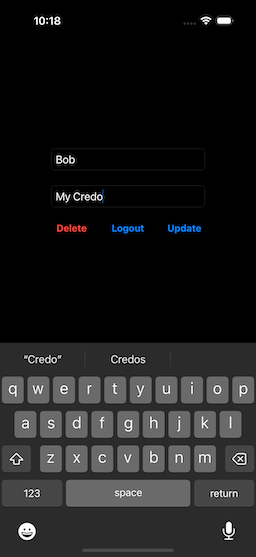 | 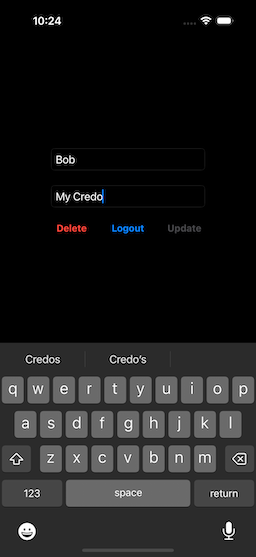 |
| Figure 10: Initial Screen | Figure 11: Entering Credo | Figure 12: After Update |
Delete
If you Select Delete, you will be asked for confirmation (Fig. 13). If you confirm, the account is deleted from the server, and you are returned to the logged-out screen (Fig. 14).
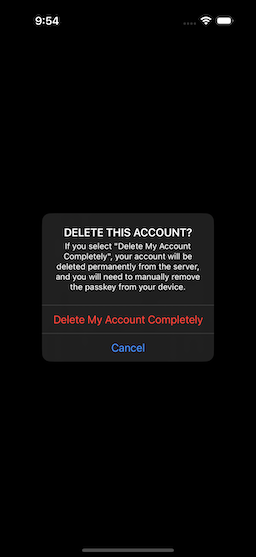 | |
| Figure 13: Delete Confirmation | Figure 14: After Delete |
NOTE: The deletion removes the account from the server, and the passkey will no longer be presented for login, but it will still exist in your Passwords Store. You will need to go in, afterwards, and delete the passkey manually.
NOTE: Even if you have a stored password on your system (like if you use the built-in Passwords App, or an app like 1Password), you’ll still need to create a passkey. Passkeys are different from stored passwords.
Now that we know what things look like, let’s start to dig into the passkey process.