What Makes A Package?
Packages are actually resolved and implemented by the built-in Swift build system at the time the package consumer project is opened (but they are linked at project build time), and rely on the executable Package.swift file, provided by the package creator.
It should be noted that, because the packages are not actually resolved and built during the project build process, their logs are not introduced to the main project build log. In a later post, I will discuss how I deal with this.
The Package.swift file must be present, at the same level as the .git directory, in order for the Swift Package Manager system to recognize the repo as a Swift package.
If the Package.swift file is present, the entire package repository will be cloned into the package consumer’s environment, in a hidden directory called .build, created at the same level as the consumer’s Xcode project file. Despite the entire repository being cloned, visibility of that repo is restricted to what is explicitly specified in the package’s Package.swift file.
Creating Packages
There are three basic ways to create a package:
- Using The Xcode
File -> New -> Swift Package...(Control-Shift-Command-N) menu item. - Using Terminal to initialize a Swift Package directory via the
swift package initcommand. - Creating a
Package.swiftfile by hand.
I’ll give a brief overview of each method here, then go into greater detail, with examples, in the following entries.
Using the Xcode File Menu Item

In the File menu, there is a menu item called “New >“. If you select that, a submenu appears, with one item labeled “Swift Package...“.
If you select that, you will get the following screen:

If you give the package a name, it will create a directory, with that name (and, possibly a git repo, if you chose that option):
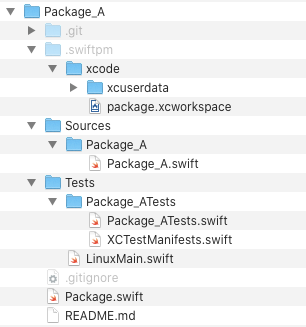
Note the invisible .swiftpm directory.
Note, also, that there is no .xcproject file. The invisible directory has a .xcworkspace file, that gathers the source files into a library build.
SPM uses the swift build command to create a library (by default), using the sources indicated in the Package.swift file. It does not use targets in an .xcproject file, so it won’t create one. This has both good ramifications, and potential issues; which I’ll address later.
I tend to delete that invisible directory, but that’s just me. It isn’t actually harmful, in any way, and helps the build. I just like to avoid having “cruft” in my repos. It will be re-added when the package is rebuilt.
Notice, also, that there is a LinuxMain.swift file. This is because, in the Linux version of Swift, some context needs to be established for XCTest. I don’t use Swift on the server, so it isn’t something I worry about. Also, see my note about tests, below.
And finally, note that a .gitignore file is created. This has the following content:
.DS_Store
/.build
/Packages
/*.xcodeproj
xcuserdata/
I will remove the last three lines from mine, so it is like this:
.DS_Store
/.build
The layout is standard for Apple packages. There is a Sources directory, with any source files in the package build, and a Tests directory, with any tests that are designed to be exported to the package consumer.
The README.md file is basically empty.
A Quick Note About Exported Dependency Tests
I’ve never understood why we should export dependency unit tests to package consumers. I understand that they can be used as a quick “sanity check,” to make sure that the package has been included in its entirety, but that’s the only reason that I can think of, as a package consumer, to have the tests available to me. They certainly won’t tell me whether or not the package will work in my environment; just that it will work in the carefully-curated test environment.
If I want to make sure the package works in my environment, I’ll need to write my own tests.
I’m big on testing. REALLY big. I just don’t see why they are the business of the package consumer.
Having exported tests makes the package more complex, and adds unnecessary “concrete galoshes.” If there is any question as to the general quality of the dependency, then why the heck am I even including it?
Adding a dependency to a project is a MAJOR decision. I expect the authors of my dependencies (usually Yours, Truly) to take accountability and responsibility for the quality of the package, and it is my responsibility to carefully examine every dependency I add to my project. If I am not 100% confident in the dependency, then it doesn’t get added.
If I want to write a quick “inventory” test to export, then I can do that, but I don’t really see the point.
I like to keep things as simple as possible, and my packages don’t necessarily export tests. Additionally, since I use test harnesses a lot, the package may have dependencies that are there, only to satisfy the test harness, so they should not be reported to the package consumer.
Once we have this directory, we can start editing the Package.swift file, or the “seed” source file under Sources.
All that said, the Package.swift file isn’t just a manifest. It’s also a sort of “makefile” for swift build, so including test targets in the file may be the only way to ensure that they are run (which I would say is a problem. I think that the testing should have been run separately, long before the package was published –even if the target is not built with an Xcode project).
Using the Command Line Utility to Create A Package
We can create a package in a fashion almost identical to the way we create empty git repos. If we start Terminal, we can do something like this:
$ mkdir Package_B
$ cd Package_B
$ swift package init
Creating library package: Package_B
Creating Package.swift
Creating README.md
Creating .gitignore
Creating Sources/
Creating Sources/Package_B/Package_B.swift
Creating Tests/
Creating Tests/LinuxMain.swift
Creating Tests/Package_BTests/
Creating Tests/Package_BTests/Package_BTests.swift
Creating Tests/Package_BTests/XCTestManifests.swift
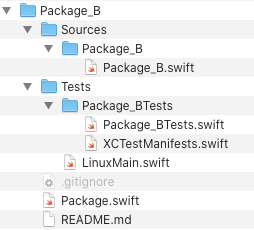
Which will create a directory almost identical to the one created from the menu item:
Note that there is no .git directory (although it does create a .gitignore file). That would require a separate git init command, after the swift package init command.
Also, this method does not create the .swiftpm invisible directory.
We can run swift package init on a prepopulated directory, but that won’t buy us much. It will simply litter our directory with the standard directories, and we’ll need to delete them, and edit the Package.swift file anyway.
Simply Adding A Package Manifest File
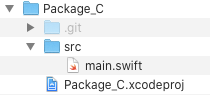
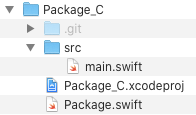
This is the method that I usually use. In this scenario, we just add a Package.swift file, written according to the PackageDescription spec, to the same level as our .git directory.
 |  |
An Ugly Problem
I found out, the hard way, that we can’t name our target “Package_B“. I renamed the target “Package_BPrime“. This will make sense, once we get to the examples.
In the next series of entires, I’ll walk through a simple package hierarchy that uses these methods, but first, I want to talk about the Package.swift manifest file.
One Reason SPM Defaults To Static Libraries
The latest versions of the MacOS operating systems rely on something called The Hardened Runtime. This is an extra security layer that requires an app to have all of its embedded executable assets signed and provisioned.
Since dynamic framework libraries need to be embedded, they must be signed. It’s usually a much easier route to simply make the libraries static, and compile/link them directly into the main executable asset.
In Example 3, we discuss this.